DriveUploader allows you to choose how the upload process is presented to your users. You can use a One-page uploader, where users prepare everything on a single screen before submitting, or a Multi-page uploader, where the upload process is divided into separate steps.
The right layout depends on how you expect users to submit their files and whether they need to add files gradually before completing the upload.
Where to choose the uploader layout
You can select the layout when creating a new uploader or editing an existing one.
- Create a new uploader or click Edit on an existing uploader.
- Open the General tab.
- Find the Layout section.
- Choose between One-page uploader and Multi-page uploader.
- Save your changes.
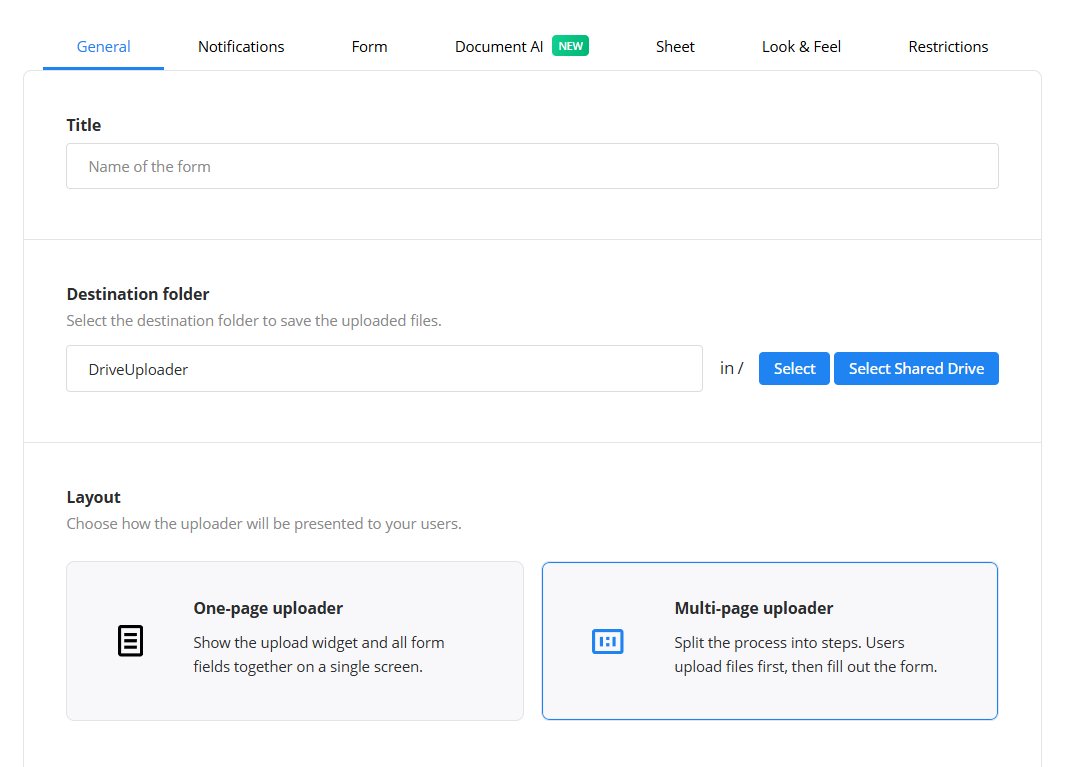
One-page uploader
The One-page uploader keeps the entire upload process on a single screen.
Users can add files or folders and see all selected files before submitting them. If you use a custom form, all form fields are displayed on the same page as the upload widget.
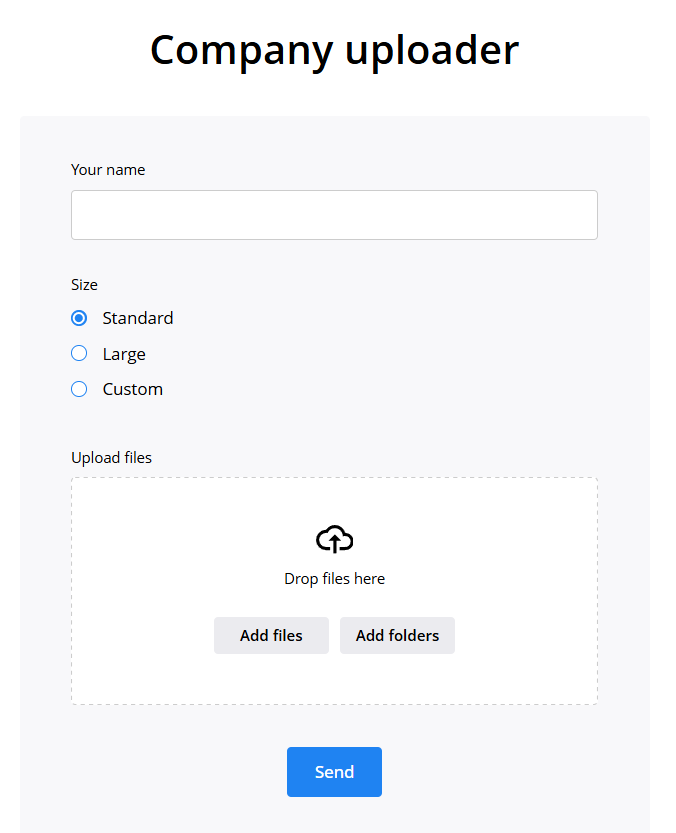
One of the main advantages of the One-page uploader is that users can add files gradually.
After adding files, they are displayed in a list before the final upload. Users can:
- See which files they have selected
- Check the size of each file
- Remove individual files
- Add more files or folders
- Fill out the custom form, if enabled
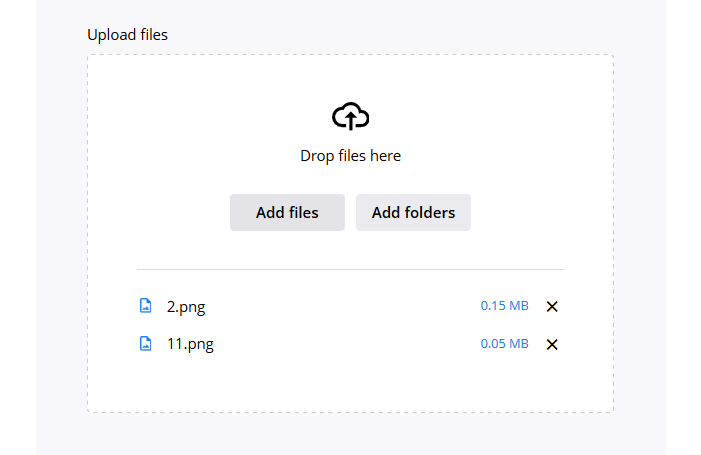
Nothing is submitted until the user clicks Send. This gives users an opportunity to prepare and review their entire submission before uploading it.
A custom form is optional. You can use the One-page layout even if you only want users to add and review files before submitting them.
When to use the One-page uploader
The One-page uploader is a good choice when users may need to add files from different locations or in multiple steps.
For example, a user can select several files, return to the uploader, add more files or a folder, review everything they have selected, and then submit the entire upload at once.
It is also useful when you want users to see their custom form fields and selected files together before completing the submission.
Multi-page uploader
The Multi-page uploader divides the process into individual steps.
Users first select the files or folders they want to upload.
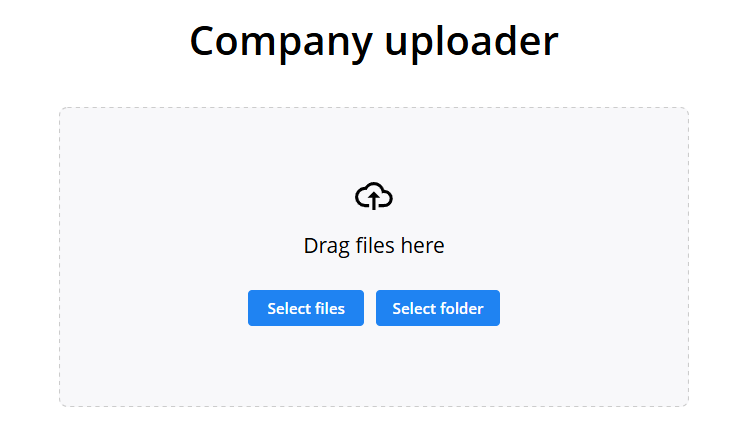
Once the files or folders are selected, the uploader automatically moves to the next step. If a custom form is enabled, the user then fills it out before completing the submission.
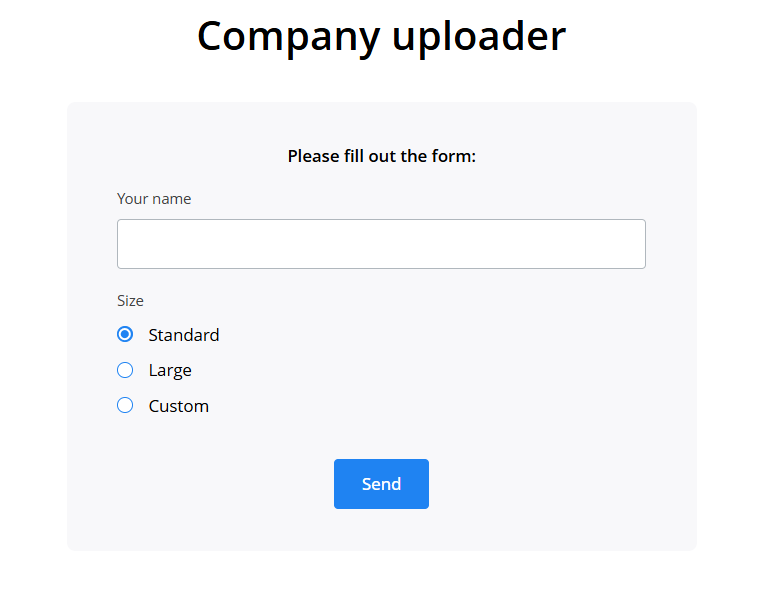
Unlike the One-page uploader, file selection happens in a single step. Users select their files or folder and then continue through the upload process. They cannot gradually build a list of files from multiple selections before proceeding.
When to use the Multi-page uploader
The Multi-page uploader is a good choice when you want to guide users through a simple step-by-step process.
It works well when users typically select all the files they need at once and do not need to review or modify their file selection before moving on to the next step.
One-page vs. Multi-page uploader
The main difference between the two layouts is not just how they look, but how users interact with the upload process.
With the One-page uploader, users prepare their entire submission before sending it. They can gradually add files, review their selection, remove files, add more files, complete any form fields, and finally submit everything together.
With the Multi-page uploader, users follow a sequential process. They select their files or folder first and then continue to the next step, such as completing a custom form.
Choose One-page uploader if flexibility and reviewing files before submission are important. Choose Multi-page uploader if you prefer a simple, guided step-by-step upload process.
You can change the layout of your uploader at any time from the General tab.
